What's cooking? Here's a sneak peak of what you may find soon on the blog.

12.17.2010

Pecan Puffs


It's amazing what a little snow can do.  Today was the first real snow of the winter here in Northern Virginia.  By "real snow" I mean just a couple of inches.  It was enough, though -- enough to get a 2 hour early release from school for thousands of giddy kids and their even more ecstatic teachers. 

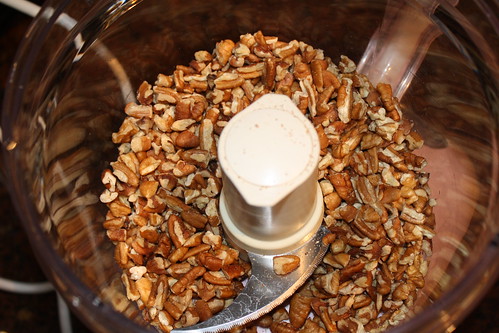
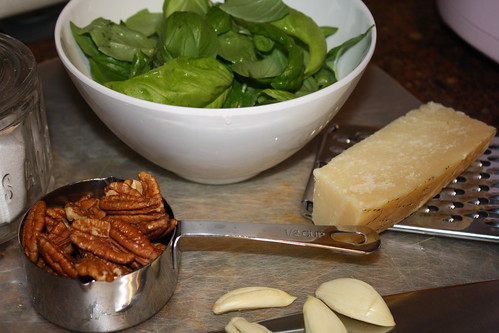
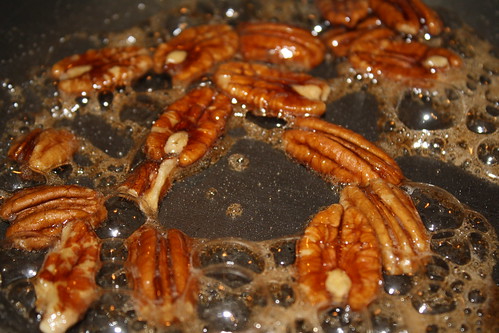
2 cups of pecans, from a highway pecan stand in Lamont, FL
When I arrived home today, I practically skipped with glee down my snowy sidewalk, filled with anticipation for holiday productivity.   The snow was just what I needed to get me in the holiday spirit.  As if a switch had magically been turned on within me, I instantly gathered butter, pecans and other baking necessities.  I lit a fire, plugged in the Christmas lights and turned on some festive tunes.  Recharged with optimism, I added four  tasks to my to do list for the day.

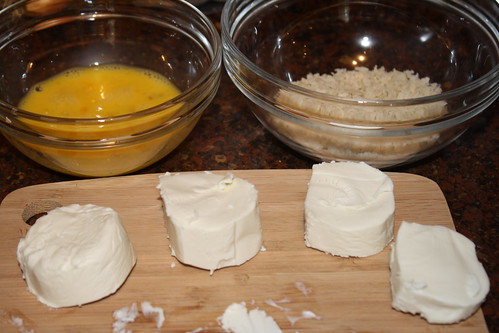
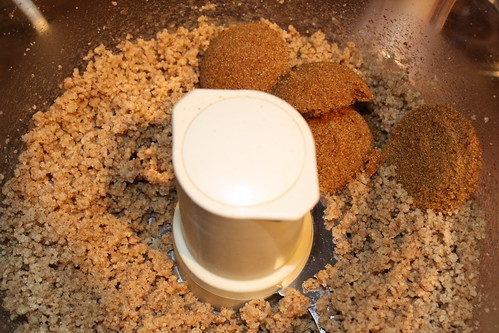
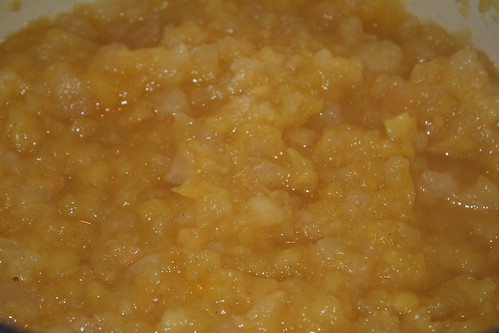
Finely ground pecans with 4 cute tablespoon-sized clumps of brown sugar

It's hard to imagine that just the day before I was sniffly, lethargic and nursing a cold on the couch.  Mindlessly surfing the television, I stopped to watched "Sarah's Holiday Party" on HGTV.  How had I not discovered this woman before? I was impressed and slightly envious of her gorgeous home, modern style, and seemingly endless amounts of time and money to prep for a fabulous holiday shindig.  That's beside the point... 


More to the point were these Pecan Puffs.  Sarah made them for her holiday party and I immediately decided I needed to make them ASAP. This vintage recipe combines some of my favorite ingredients: butter, pecans, and a heavy dusting of powdered sugar.  Need I say more?  Motivated by my snow-induced burst of energy, I immediately began prepping for my own batch of Pecan Puffs. 


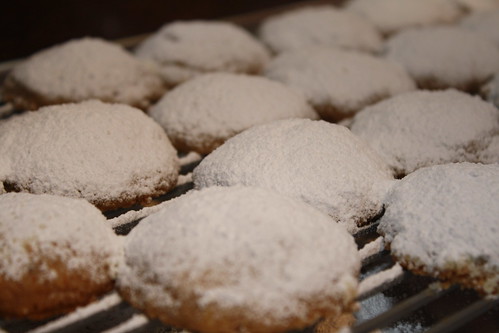
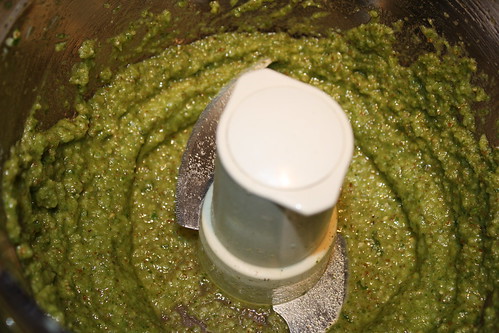
These wintery puffs couldn't be easier to make. The ingredients are simple -- just butter, pecans, brown sugar, cake flour, and vanilla.  Even better, you can quickly whip up the batter in a food processor.  When you take them out of the oven you top them off with a thick dusting of snow, er, powdered sugar.  The sugar melts slightly into the warm cookie and helps to add a little sweetness.  Once the cookies have cooled, you  top them off with a fresh dusting of sugar.  


Let it snow, let it snow, let it snow!

You can get the recipe (and directions for her other holiday craftiness) on Sarah's facebook fan page.

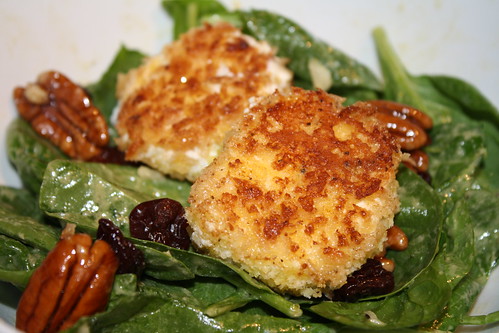
(In the interest of full disclosure, I must admit that these cookies, sadly, didn't live up to my expectations.  I'm not sure what I expected, but they didn't quite hit the spot. Mine didn't turn out as puffy as Sarah's.  I knew the  cookies would be very crumbly and then instantly melt in my mouth.  However, I wasn't prepared for exactly how delicate they actually were.  The melt in my mouth was good...but the stick to the roof of my mouth wasn't as great.  Overall, the puffs are good and remind me of cookies I had eaten long ago. They're very close to a pecan sandy. On the upside, they have an heir of nostalgia about them and their powdery white tops certainly remind me of snowy holidays.)

11.01.2010

Velvety Pumpkin Soup


It's a good thing this soup tastes so good.  Slicing, seeding and peeling a pumpkin is no small task.  I'm not gonna lie.  It's a royal pain in the patooty. At one point, as I was covered in sticky, orange strings and nursing a minor knife cut on my finger, I considered throwing in the towel and ordering pizza. 

I'm so glad I didn't.


Earlier in the week, my mom mailed me a handmade book of pumpkin recipes from an old Victoria magazine.  She's so good at "snail mail" and often sends me homemade cards and little surprises, just because.   I had a couple of pumpkins on hand from our CSA, Great Country Farms, so it was the perfect time to try out several pumpkin recipes.


I made a few recipes, including sweet and spicy toasted pumpkin seeds and a vegetarian chili with chunks of pumpkin.  Hands down, though, my favorite recipe was this pumpkin soup.


Once you get past the nasty peeling, seeding and slicing bit, the soup really is pretty simple.  You start by finely chopping the base flavors -- lots and lots of shallots and leeks.  These wonderfully mild onion-cousins (yes, I made that up...) are added to a large, heavy-bottomed pot with a few tablespoons of butter.   Sounds good already, right?


After the shallots and leeks have softened in the butter, add vegetable stock and then...forget about it.  Well, sort of.  The pumpkin simmers in the stock for about half an hour until it softens.  You'll just need to stir it a few times.  When the pumpkin is soft, toss it all into a blender to puree.  Better yet, if you have an immersion blender, you can puree it directly in the pot.


If you stopped there, you'd have a deliciously simple soup.  The recipe calls for adding a fancy shmancy wild mushroom garnish and an apple cider reduction.  I'm not a huge fan of wild mushrooms, so I made my garnish with crimini (baby portobello) mushrooms.  The cider reduction, mixed with cream, was fine, but I think not really necessary.  The cooked mushrooms added some nice textural contrast, but could be left out as well.  Whether you decide to go fancy shmancy or not, I think you'll really enjoy this velvety fall soup.


Here's the proof.

10.16.2010

Potato Pancakes


Kartoffelpuffern -- or potato pancakes (so much less fun to say) -- are a guilty pleasure of mine.  Next to scones, they are my favorite breakfast/anytime item to make. Just the thought of crunchy, warm potato patties smothered in tangy sour cream and sweet apple sauce makes me swoon.


Recently (er, not so recently...I've been a wee bit busy lately and have fallen behind on blogging) I attended the "big dig" at Great Country Farms.  It was my first potato digging experience.  Well, actually, the tractor really did all the digging.  It ripped up the fields and I (and dozens of kids) jumped behind the tractor, scooping up the piles of potatoes in its wake.  Ryan and I left with a bag full of the freshest, best potatoes we'd ever tasted!  


Thanks to my always trusty food processor, I can turn a few small potatoes and half an onion into perfectly shredded ribbons in about 3.5 seconds.  From there, gather up all the potato/onion shreds into a cheesecloth or kitchen towel (even some sturdy paper towels would work) and squeeze out most of the liquid.


In a large bowl, combine the potato and onion shreds with salt, pepper, bread crumbs, and a beaten egg.  I love it when the simplest ingredients produce such tasty results!

Meanwhile, heat a couple tablespoons of oil in a heavy-bottomed pan or skillet.  When the oil is shiny and hot, add heaping tablespoons of the potato mixture into the pan, flatten with the back of the spoon and then cook for a couple of minutes (until the edges begin to turn golden and crispy).  Heat for another 2 minutes and you're done!


I like to "accessorize" my potato pancakes the German way -- with sour cream and homemade apple sauce.  They're pretty darn tasty, though, on their own.


Ready to make your own?...

10.03.2010

Cheese Stuffed Fried Pumpkin Blossoms


I've been dreaming about making this dish for a while -- ever since I saw a version of fried zucchini blossoms featured in a food magazine last year.  Mind you, I'd never actually eaten stuffed blossoms of any kind, but I could immediately tell that it would be one of those "love at first bite" dishes.  The magazine promised me that these various squash blossoms were often sold at farmers' markets.  Once summer arrived, I immediately set out in search of these edible flowers. 


I searched...and I searched...and I searched.  Now with October settled upon us, I had all but given up on finding these elusive treats.  (One day, several weeks back, I did spy a lone squsah blossom in a stranger's yard and almost plucked it for myself...almost.)

There's a small bit of prep involved before you can eat the blossoms.  It feels a bit invasive as you pull out the stamen, but it has to go.  Poor guy.

Today we visited Great Country Farms in search of a few perfect pumpkins.  I was pretty excited.  As I confessed to Ryan on our hayride out to the fields, I had never before actually picked a pumpkin.  My previous pumpkin picking experiences consisted of choosing the best pumpkin from the grocery store.  (I don't think we even had pumpkin patches in Florida.  That's my story, at least, and I'm sticking to it!)


As we tumbled out of the hayride, I immediately saw them! Little children ran to claim their pumpkin prizes and I began plucking the pumpkin blossoms with equal fervor. They were just like the squash blossoms I'd been searching for -- delicate and yellow and just plain beautiful. 


I gathered all the blossoms that I could hold in one hand and then rejoined Ryan to help choose a pumpkin.  We did take home a couple of pumpkins today -- one for decoration and one for eating -- but it was the blossoms that really made the trip a success.

Stuffed.

This fall, if your family makes a trip out to the pumpkin patch, make sure to take home some blossoms and try this dish!  Just make sure to use the blossoms on the day you pick them.

9.22.2010

Homemade Apple-Pear Sauce


This recipe was originally going to be an apple crisp.  It's been one of these weeks, however, when nothing has gone quite as planned.  After several days of neglect, the lovely gala apples on my kitchen counter had begun to look a bit homely.  Since the apples were turning to mush, I decided to just go with it and make applesauce instead.  Spying some equally neglected Asian plums, I threw them into the mix as well.

The result was a simple, wholesome delight.


Now that we are in the throws of apple season, I encourage insist that you make your applesauce.  It's quick, easy and super versatile.  You can use any kind of apple (or a mixture) andt can adjust the seasoning and sweetness to your own preferences.  Best of all, picking your own apples and making apple sauce makes a great memory!


The recipe below can be easily doubled.  It will keep about a week in the refrigerator or up to six months in the freezer.

Chunky -- just the way I like it!  Feel free to mash it up more or run it through a food mill to get a smoother sauce.


Homemade Apple-Pear Sauce

You'll need...
3 pounds total of apples and pears  (I used about 2 pounds of apples and 1 pound of pears)
1/2 cup of water
2 Tbsp lemon juice
pinch of salt
sugar, to taste (I used about 2 Tbsp)
cinnamon, to taste (optional) -- I used just a few shakes

Directions...
Peel, core and roughly chop the apples and pears – sprinkling with the lemon juice as you go, to avoid browning.

Add the water and apples/pears to a large pot on the stove.  Bring them to a boil over medium-high heat and then simmer for 10-20 minutes, until the apples/pears are soft.   (If you're using only apples, the time may be closer to only 10 minutes.  I found that the pears took longer to soften -- depending on how ripe they are.)

Once the apples and pears are soft, add the salt, sugar and cinnamon.  Stir to allow the sugar to dissolve and then mash the apples/pears, using a potato masher.  I like my applesauce a little chunky, so I didn't mash them too much.

Taste the sauce and add more sugar and/or cinnamon if you think it needs it.

That's it! So easy.

Now that I've picked apples and  made applesauce I feel like fall has officially arrived.  Let the leaf color changing begin!

9.19.2010

Tofu Meatballs


I fully recognize that, by posting anything with "tofu" in the title, I may send my readers (all 6 of you!) running for the hills.  I am a vegetarian, though, and much of what I cook does center around this versatile protein.  If you're still reading at this point, I promise that these "meat" balls are well worth a try!  The pesto (from last week's post) is the secret ingredient that takes these balls from simply a source of protein to a tasty standout.

I first started making these tofu balls about a year ago.  Disgusted by the lack of decent "meatless" meatballs, I decided to try and make my own.  Back in my meat-eating days, meatballs were one of my favorite things to cook (and eat).  I realized I could use many of the same ingredients (minus the meat, of course) and come up with my own tasty vegetarian version of a meatball.  After all, once you put garlic, cheese, breadcrumbs and fresh herbs into just about anything, the result is usually pretty amazing.

The first several versions of my tofu balls were good, but last week I managed to make them delicious.  Tofu?  Delicious?!  Oh yes!

It happened sort of by accident.  It was one of those days when I was trying to clean out the refrigerator and pantry to use up all my ingredients that were about to bite the dust.  As it so happened, "leftover frenzy" gave way to a masterpiece.

Unfortunately, when I sat down to write this post, I couldn't find my notes.  (Normally when I cook something for the blog I keep notes as I cook so I can tell you exactly what I used and how I used it.)  It's entirely possible that I didn't even write any notes for this meal, since I didn't expect the result to be so yummy.  

Alas, here is my best recollection of this surprise winner of a meal.  The measurements are approximate and my best guess of what I actually included. Maybe, despite all of my ambiguity, you'll create your own meatless masterpiece!

9.12.2010

My Favorite Two Quick & Easy Sauces


It's the beginning of a new school year, so I'm working really long hours and getting home feeling a bit bedraggled.  If I manage to cook anything at all right now, it's got to be quick and easy.  That's where my food processor comes in.


If you couldn't already tell, my food processor is the one kitchen gadget that I couldn't live without.  It is such a time saver and allows me to quickly whip up many of my favorite meals, including these two sauces: Basil Pesto and my "Ready in a Blitz" Roasted Tomato Sauce.


Pesto

I love, love, love pesto.  Each time I eat it, I'm reminded of a trip I took with my mom to the Liguria region of Italy (the region where pesto originated).  We were hiking through the beautiful "Cinque Terre" and ate pesto with fresh pasta at least once each day. We also ate lots of Nutella, but that's for a different post...


Pesto ("Genovese Pesto") is traditionally made with basil, pine nuts, garlic, salt and olive oil.  A hard cheese (like Parmesan) is also usually incorporated.  I pretty much stick to these ingredients, but one time a couple of years ago I was out of pine nuts. The only nut I had available was a bag of pecans in the freezer. So, I shrugged and tossed them in.  The result was so surprisingly good that I've used pecans in my pesto ever since.  


Pesto is one of those sauces that I've made so many times that I no longer need to measure anything.  I just toss in the amount that looks "right".  For those of you who need measurements, I've tried my best to include precise amounts below.  Feel free to make adjustments that match your tastes:

You'll need...
1/4 cup nuts (pine nuts, walnuts or pecans!)
2 cups packed fresh basil
1/2 cup grated Parmesan
3 cloves of garlic (plus or minus a clove, based on your taste)
1/2 tsp salt
1/4 tsp freshly ground black pepper
2 Tbsp olive oil

Directions...
Add all the ingredients (minus the oil) to the food processor.  Turn on the processor and stream in the olive oil while it pulses.  Process until smooth.  Taste and adjust seasoning if necessary.

Now, spoon over some pasta and pretend you're in Italy.  Buon Appetito!


Ready in a Blitz Roasted Tomato Sauce


I love the taste of roasted vegetables.  Roasting vegetables brings out a rich depth of flavor, caramelizing them and making them just plain really, really good.  Tomatoes and garlic are two of my favorites to roast.  If you decide to make this, hurry before the last of the summer tomatoes escape.  


I love this recipe for a work day because I can get home, prep the veggies in about 5 minutes and put them in the oven to roast.  Then, I can use the next 20 minutes or so to prep the rest of the dinner or set the table or just kick back and enjoy a glass of wine.   Before I know it...ding...the veggies are done and all I have to do is slide them into the food processor.  I simply pulse 5 seconds and...dinner's ready!


You'll need...
tomatoes (any amount)
onion (about 1/2 a small onion per 3 medium tomatoes)
garlic (to taste -- I like a 3 or 4 cloves per 3 medium tomatoes)

(+ any other veggies you have on hand that you think would be yummy.  I think carrots or shallots or red pepper would be nice.)

olive oil, for drizzling
salt + pepper, to taste
fresh or dried herbs (I usually use thyme and/or basil)

Directions...
Preheat the oven to 400.

Slice the tomatoes in half or quarters and place them on a sheet pan, covered in parchment.  Slice the onion into large chunks (roughly the size of the tomatoes) and place on the pan, with the garlic.  Drizzle olive oil over all the veggies and sprinkle with salt and freshly ground pepper.

Place the veggies into the oven and roast for 20-30 minutes, until browned and slightly caramelized. You may need to pull the garlic out early so it doesn't burn.

(Near the end of the roasting process, cook your pasta so it will be ready in time.)

Once roasted, slide all the veggies into a food processor, add herbs and pulse until a smooth sauce.  

That's it. Really!

9.05.2010

Spinach Salad with Warmed Goat Cheese

IMG_1284

One fall, a couple of years ago, Ryan and I attended a weekend conference near Harper's Ferry, West Virginia.   The event was for a great cause, but by late Saturday afternoon I had reached my fill of meetings, brain storming sessions, and bad hotel catering.  I convinced Ryan that we should skip the last workshop and steal away to nearby Charles Town to see what we could find.

Such a cute little onion!  I was all out of shallots, so I used this little guy in the dressing. 
That evening was pure serendipity.  Thanks to our little side trip, we discovered Dish, a bistro that had just opened a few weeks before.  The menu was filled with simple "comfort" foods with a modern, healthy twist and everything was made from local, seasonal ingredients. In other words, right up our alley.  Everything we tried was so good.   We liked it so much that we skipped our morning events and returned for breakfast the next day. 


One of our favorite parts of the meal was a spinach salad with warmed, crusted goat cheese. So simple and yet it was to die for.  I may be a vegetarian, but I do not usually say this about salads. Ever.  When we arrived home after the weekend, I was determined to recreate this leafy morsel.   


Dental floss is a quick way to slice the cheese without "squashing" it with the weight of a knife


I think I've come pretty close.  This is such a great salad because it's so easy, very quick to put together and truly satisfying.  It's a wonderful blend of complementary textures and flavors -- creamy with crunchy, savory with sweet.


Because it's so quick and easy to make, the salad is the perfect week day meal.  The dressing makes enough for 2 dinner-sized salads and I usually have enough to make a salad for my lunch the next day.  When I pack the salad for lunch, I simply crumble fresh goat cheese over the top.  This is a lighter, even easier way to prepare the dish-- and it's just as delicious.


I don't normally add candied pecan topping to the salad, but it's been a tough week.  I decided to treat myself after a long, hard day!

8.23.2010

English Tea Scones


I'm not sure exactly when my fascination with the British began.  I'm sure my mom and Jane Austen had something to do with it. There was a lot of Pride and Prejudice and Enchanted April in my upbringing , with a little Keeping Up Appearances thrown in for good measure.  There were also a lot of fake British accents, tea parties and, of course, scones.  Sometime in high school I taught myself to make scones and they remain one my absolute favorite things to bake.  Ever.


This was a plain batch -- plain, but ever so tasty

I really don't need a good excuse to bake scones.  Friends visiting? Time to bake scones.  Ladies' get together?  Must bake scones.  It's Saturday...scones!  So, for Gretta's bridal shower, what did I offer to bring?  Well, scones, of course!  I was delighted that they turned out to be such a hit, especially considering that I mindlessly left my favorite scone accompaniment,  my "faux Devonshire cream", at home in the refrigerator.  tsk, tsk, tsk...


How sweet!  I added dried tart cherries to the heart-shaped scones.  I only wish I had added more!

As an aside, I almost always make scones by hand.  A couple of times I have tried using the food processor to cut in the butter and combine the dough, but it's just not the same.  I don't mean the taste and texture aren't the same --  those don't really seem to suffer.  It the experience for me that changes.  When you make scones by hand, the smell of butter billows up as you're cutting it into the flour. Then, after folding in the liquid ingredients, I love to plunge my hands into it the bowl and gently knead the crumbly mess into a uniform dough.  A food processor just takes too much of the pleasure away...and far too much of the necessary mess.  While preparing the dough in the food processor will shave off a few minutes, you can still whip up a batch rather quickly, especially once you get the hang of it.


I love how these herbs serve double duty.
They are both a beautiful table decoration
and a very useful party favor!


The recipe below is a basic tea scone recipe.  It's wonderfully adaptable and I'll share some of the small ways I sometimes change it up.