
 |
 |
| This was a plain batch -- plain, but ever so tasty |
I really don't need a good excuse to bake scones. Friends visiting? Time to bake scones. Ladies' get together? Must bake scones. It's Saturday...scones! So, for Gretta's bridal shower, what did I offer to bring? Well, scones, of course! I was delighted that they turned out to be such a hit, especially considering that I mindlessly left my favorite scone accompaniment, my "faux Devonshire cream", at home in the refrigerator. tsk, tsk, tsk...
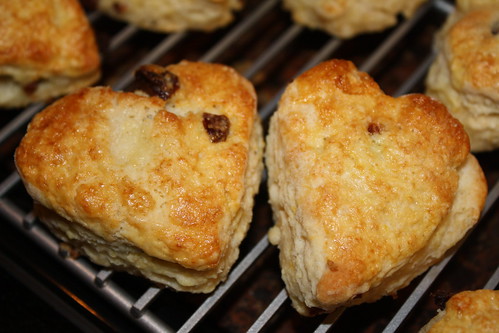 |
| How sweet! I added dried tart cherries to the heart-shaped scones. I only wish I had added more! |
As an aside, I almost always make scones by hand. A couple of times I have tried using the food processor to cut in the butter and combine the dough, but it's just not the same. I don't mean the taste and texture aren't the same -- those don't really seem to suffer. It the experience for me that changes. When you make scones by hand, the smell of butter billows up as you're cutting it into the flour. Then, after folding in the liquid ingredients, I love to plunge my hands into it the bowl and gently knead the crumbly mess into a uniform dough. A food processor just takes too much of the pleasure away...and far too much of the necessary mess. While preparing the dough in the food processor will shave off a few minutes, you can still whip up a batch rather quickly, especially once you get the hang of it.

 |
| I love how these herbs serve double duty. They are both a beautiful table decoration and a very useful party favor! |
English Tea Scones
printer friendly version
You'll need:
2 cups (280 grams) all purpose flour
2 tsp (8 grams) baking powder
3 Tbsp (52 grams) granulated sugar
1/2 tsp (3 grams) salt
1/3 cup (5 1/3 Tbsp or 76 grams) unsalted butter - cut into small cubes
zest of one lemon
1/2 cup milk
1 large egg, beaten
1 tsp vanilla extract
Optional: 1/3 - 1/2 cup of dried cherries, cranberries, raisins, chocolate chips, nuts -- be creative!
Egg wash:
1 large egg, beaten
1 Tbsp milk
Directions:
Preheat oven to 400 F. Line a baking sheet with parchment paper or a silicon sheet. Mix together the beaten egg and milk for the egg wash and set aside.
Zest the lemon and prepare any "extras" you may want to add. This time, I'm adding about 1/3 cup of dried tart cherries. These were wonderful in the scones and I only wish I had added more!

I am certainly not a pastry chef, but I do know one of the cardinal rules of baking pastry -- keep everything cold. This keeps the crucial ingredient, butter, from melting and helps the final product to end up flaky, tender and extra fabulous. When prepping the ingredients, work quickly to cube the butter and then immediately place it in the fridge.
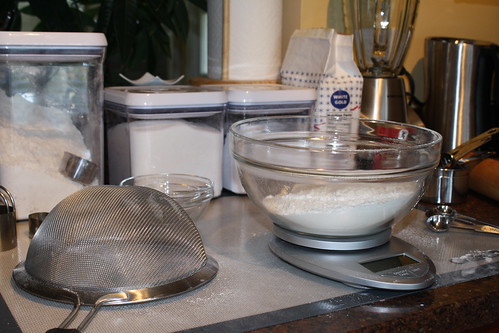
As for the dry ingredients, sift the flour, baking powder, sugar and salt together. Then, whisk them away into the fridge! (I've added the weights for the dry ingredients because I like to use my kitchen scale to measure these. I don't have to use measuring cups -- I just sift them into the bowl and over the scale until I get to the correct weight. For baking, I really like the precision of weight measurements over volume.)
In a measuring cup mix together the beaten egg, the 1/2 cup of milk and the vanilla. Then -- you guessed it -- put it in the refrigerator.
printer friendly version
You'll need:
2 cups (280 grams) all purpose flour
2 tsp (8 grams) baking powder
3 Tbsp (52 grams) granulated sugar
1/2 tsp (3 grams) salt
1/3 cup (5 1/3 Tbsp or 76 grams) unsalted butter - cut into small cubes
zest of one lemon
1/2 cup milk
1 large egg, beaten
1 tsp vanilla extract
Optional: 1/3 - 1/2 cup of dried cherries, cranberries, raisins, chocolate chips, nuts -- be creative!
Egg wash:
1 large egg, beaten
1 Tbsp milk
Directions:
Preheat oven to 400 F. Line a baking sheet with parchment paper or a silicon sheet. Mix together the beaten egg and milk for the egg wash and set aside.
Zest the lemon and prepare any "extras" you may want to add. This time, I'm adding about 1/3 cup of dried tart cherries. These were wonderful in the scones and I only wish I had added more!
I am certainly not a pastry chef, but I do know one of the cardinal rules of baking pastry -- keep everything cold. This keeps the crucial ingredient, butter, from melting and helps the final product to end up flaky, tender and extra fabulous. When prepping the ingredients, work quickly to cube the butter and then immediately place it in the fridge.
As for the dry ingredients, sift the flour, baking powder, sugar and salt together. Then, whisk them away into the fridge! (I've added the weights for the dry ingredients because I like to use my kitchen scale to measure these. I don't have to use measuring cups -- I just sift them into the bowl and over the scale until I get to the correct weight. For baking, I really like the precision of weight measurements over volume.)
In a measuring cup mix together the beaten egg, the 1/2 cup of milk and the vanilla. Then -- you guessed it -- put it in the refrigerator.
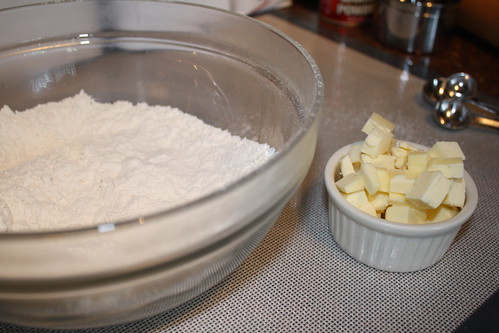
With a pastry blender (or two forks....or in a food processor, if you must) "cut" the butter into flour until it resembles course crumbs. You really just want to make sure the butter is all broken down into even smaller pieces and each piece is coated with flour. This is one of my favorite parts. Oh the glorious smell of butter!
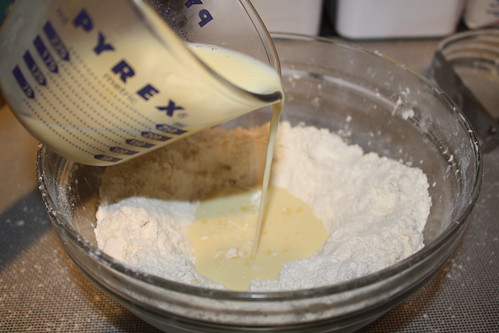
Don't let the butter get too warm -- remember, we want it to stay chilled until it makes it into the oven. As soon as all the bits are coated in flour, use your hand to make a well in the center of the dry ingredients and then pour in the egg/milk mixture. Quickly stir the liquid in, just until it's a mostly dry, shaggy mess. I suppose the other cardinal rule of pastry making is not to overwork the dough.
I usually knead the dough a few times in the bowl before turning it out on the counter. You can see in the picture below that I get a little ahead of myself and I dumped out the mess before any kneading. I guess handling a camera with gooey fingers while baking will throw off your rhythm...
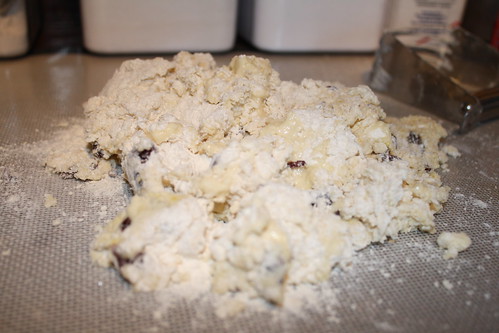
Knead the dough just until it all comes together -- and not a second more.

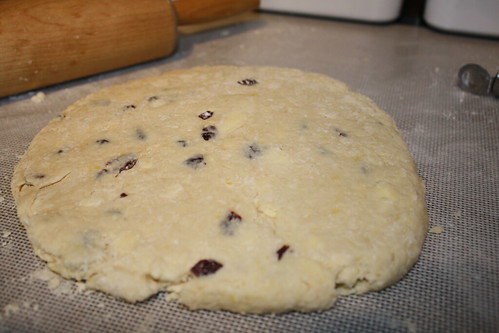
Using a rolling pin, quickly roll the dough until it is about 1/2 inch think. If the dough seems overly sticky, lightly dust it with flour before rolling.
 |
| Can you see the little chunks of butter? Those are going to make the scones so good. |
Use a cookie or biscuit cutter, dipped in flour, to cut out the scones. Roll any leftover scraps and cut the remaining dough. Brush the egg wash over the top and sprinkle with sugar, if you so desire.
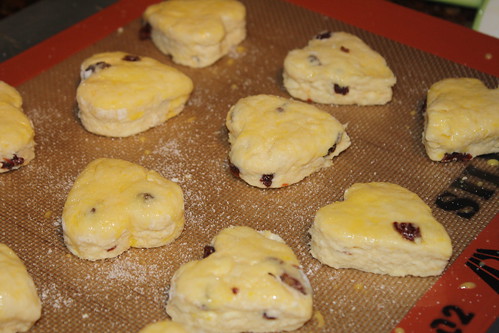
Pop these little cuties into the hot oven and bake until golden brown on top -- about 15 minutes. I always check them a few minutes early, just to be sure.
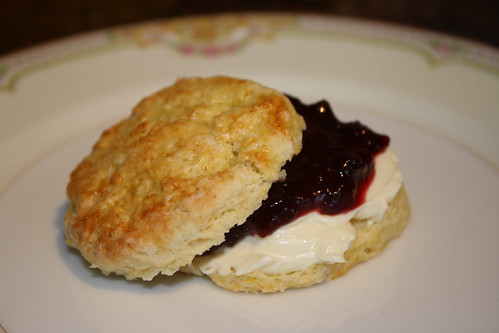
Enjoy plain or with jam (blackberry is my favorite), lemon curd or whipped cream.
No comments:
Post a Comment