
I use A LOT of canned crushed and whole tomatoes. They come in handy when I make my own sauces or soups. The downside, however, is that all the acid in tomatoes causes the cans to leach BPA. This is the main reason that I have been anxiously awaiting the onset of tomato season -- so I can jar my own tomatoes at the peak of perfection and avoid all those nasty hormone disruptors! Unlike in my native Florida, tomato season in northern Virginia doesn't start to kick into full swing until the end of July. So, it seemed like FOREVER until the time would arrive...but, at last, the waiting is over.
I arrived home from Stoneybrook Organic Farm Market in Hillsboro, VA with 53 pounds of organic tomatoes and the enthusiasm of a girl who had no idea what she was getting herself into. Seriously, I don't recommend embarking on a canning adventure of this magnitude alone. With my hubby in Denver, and my mom off to Florida the next day, I was left to tackle the tomatoes alone.
Day one was brutal -- 8+ continuous hours on my feet in the kitchen! It was quite a messy, long learning experience. (Did I mention I've never done this before?) By day two I had learned from my mishaps and was able to organize the process to make it much more manageable. Consequently, the entire process ran much more smoothly (and quickly!) and the results were what I'd hoped for originally.
I highly recommend recruiting a friend or family member to help if you decide to jar your own crushed tomatoes. Either way, the directions for crushing and packaging your own bit of summer in a jar are continued after the jump... Enjoy!
Ok, like all complicated kitchen endeavors, the most important thing is to get organized. I began by clearing off lots of counter top space in my kitchen...which meant, sticking it all in the dining room. This was a lesson learned. I didn't have nearly enough counter top space the first day. It's also a good idea to start boiling the water for the "processing" of the jars. Since the pot is so large, heating the water takes a loooong time (especially if you're like me and have an electric cook top). So, start that water boiling asap. Make sure all the jars are cleaned and sterilized ahead of time. I won't go into all the gory details about home canning. If you need those, you can find them here.
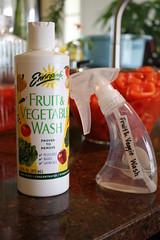
Next, I started with a manageable portion of my tomatoes (about 15 pounds?), washed them and layed them out in a single layer on the counter. I love this fruit and veggie wash. It's not necessary (plain ol' water will work fine too), but I like to use it especially on grocery store produce to help remove wax and other surface chemicals. It's highly concentrated, so I keep a diluted mixture in a spray bottle on the counter.

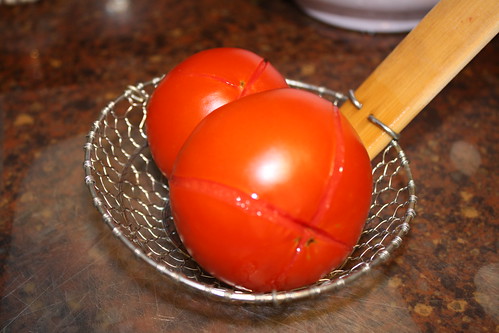
Once the tomatoes are spread out, bottoms up, I cut a small "x" on the bottoms. This will make them super easy to peel later. The "x" should not be very deep - just deep enough to slice through the skin.
Now, it's time to set up some stations. I don't have room in my kitchen to set up all the stations for the entire process at once, so I set up the stations in "phase 1" first. This is where a friend comes in handy. If you don't have a friend, I don't recommend too much multi tasking. Just start with the first station and rotate through one by one.
Phase 1:
Blanch and Peel Station
You'll need a medium or large pot of boiling water, a ladle of some sort, a bowl of ice water and a place to keep the peeled tomatoes.

Slice, Seed Station
Make sure to have a space to slice, a bowl the catch and save* all the "guts" and juice, and a bowl to collect the seeded tomatoes. (*Seriously, save the juice. I'll show you what to do with it in a later post.)
 |
| I know you're tempted, but don't throw out the stuff in the pink bowl! |
Phase 2:
Crush, Cook Station
You'll need a large, heavy pot, a ladle of some sort and a "crusher" -- a potato masher, hand blender or even a wooden spoon will work fine. Bring the bowl of seeded, sliced tomatoes over to this station.
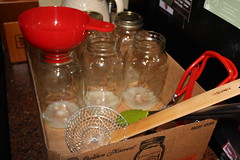
Jar and Process Station
You'll need a large huge pot of boiling for a water bath, jars (I used quart sized mason jars), and You'll want to have all the jars and lids, cleaned, sterilized and ready to go, nearby by stove. Each jar should have 2 Tbsp of lemon juice and a pinch of salt. This will help to ensure proper preservation. It's very helpful to have a wide mouth funnel and these special jar lifting tongs. In fact, I'm gonna say they are both "must haves" if you do any home preserving.

Ok, now that we're all organized (and hopefully you've managed to recruit a helper), let's begin!
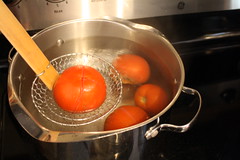
Step one is to blanch the tomatoes. At first this step seemed a bit unnecessary and setting it up took up quite a bit of my limited kitchen space. However, once I actually tried it, I could not believe how utterly easy it made the peeling process. In fact, after blanching the tomatoes, they practically peeled themselves. Don't skip this step! It's a huge help.
To blanch, slide a 4-5 of the tomatoes into a pot of boiling water. After about 30 seconds, scoop them up and plop them into a bowl of ice water. The ice bath will cool off the tomatoes and cause the skins to easily slide off. After a few seconds or so in the ice bath, scoop up the tomatoes and squeal in delight as the skins slide easily off. (Squealing in delight is optional, but you should try it sometime.)
 |
| The tomatoes will splits right along the "x", making the skins slide right off once they're dipped in the ice bath. |
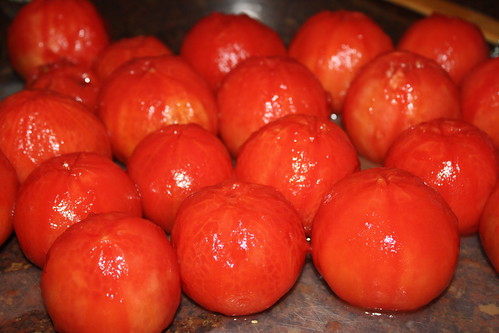 |
| Look at those perfectly peeled tomatoes! |
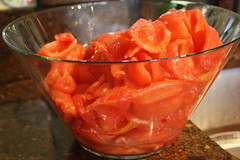
The next step (which, if you've managed to recruit a helper could be happening simultaneously as you blanch and peel) is to slice and seed the tomatoes. I core, quarter and seed the tomatoes. Get as much of the seeds and extra juice out as you can. You don't have to go crazy on this step, though. Removing most of the juice and seeds is fine. (I do this over a bowl in the sink so that I can save the juice and use it later. You'll end up with cups and cups of the stuff and just throwing it down the drain seems like a travesty. I'll show you some ideas of things to do with it soon.)
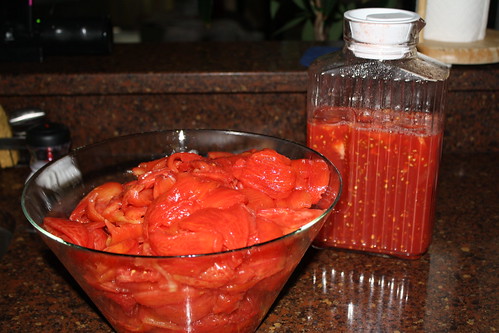 |
| My bowl of seeded, sliced tomatoes and the reserved juices that I've transferred to a container to use later. |
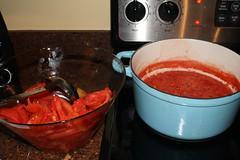
We're getting close to the finish!!! Time to actually crush the tomatoes.
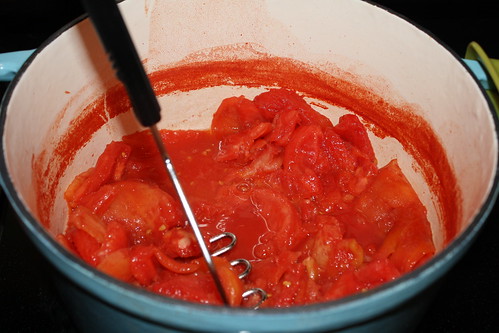
Scoop about 1/5 to 1/4 of the tomatoes into a large, heavy pot over medium high heat. I used a potato masher to crush the tomatoes, but a wooden spoon with a bit of force will do the trick. The crushed tomatoes will release a lot of juices, which is what you want.
Once you've crushed the tomatoes to your liking, bring the juicy mixture to a boil. Then, ladle a few more scoops of tomatoes into the pot, crush them lightly and wait a minute or so until the mixture returns to a boil. Continue this process (scoop some tomatoes, bring to a boil) until you've added all the tomatoes into the pot. After the first couple round of scoops, it's not necessary to continue crushing. The juices in the pot will help to break down the rest of the tomatoes. (Once you've scooped out all the raw tomatoes, you'll likely have a bit of juice that has migrated to the bottom of your bowl. Don't add the extra juice to the pot on the stove, unless you see later that you need more. I transferred mine to the container of reserved juices.)
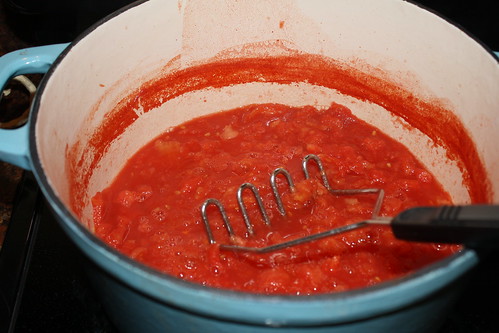
Finally, return the entire mixture to a boil and allow it to boil gently for about 10 minutes -- or until the tomatoes are crushed and cooked down to your liking. If you want to, you can do a little bit more crushing with your masher at the end. If you'd like the tomatoes to resemble more of a puree, you could also use a hand blender at this step.
(If you don't have the equipment to preserve the tomatoes in jars, or you simply don't want to fuss with all the canning stuff, you could just freeze the crushed tomatoes. Better yet, puree them and place them in freezer bags or freezer safe containers!)
(If you don't have the equipment to preserve the tomatoes in jars, or you simply don't want to fuss with all the canning stuff, you could just freeze the crushed tomatoes. Better yet, puree them and place them in freezer bags or freezer safe containers!)
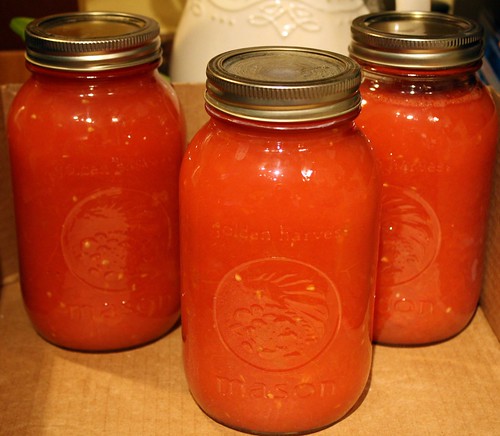
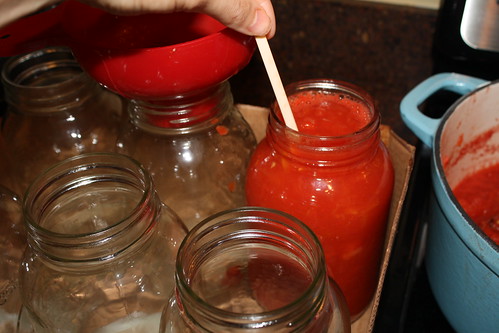
Finally, ladle the crushed tomatoes into your prepared jars. (That red funnel is a life saver!) Leave about 1/4 inch of head space. That's the space between where the liquid stops and the rim of the jar begins. I used a plastic chopstick to remove trapped air bubbles (and you should too). Wipe off the rims, add lids and screw on the bands. We're almost done...
Use jar tongs (I'm not even sure if this is the right name, but it sounds good to me) to carefully lower your precious tomatoes into pot of boiling water. I've read that you want to make sure to lower and lift the jars straight up and down. No funny sideways business. I'm not sure why, but I'm a rule follower, so I always do...
You'll need at least an inch of water above the jars. I had to add more to my pot. "Process" (boil) the jars for about 40 minutes if you're using quarts and 30 minutes for pints. The processing time begins when the water returns to a boil.

Once the jars have fully processed, use the tongs to carefully lift them up and allow them to rest undisturbed for at least 12 hours. Don't touch them, bump them, move them or breathe too hard on them. Ok, maybe that's a little extreme, but everything I read says to leave them alone...and I've already told you I'm a rule follower.
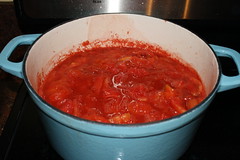
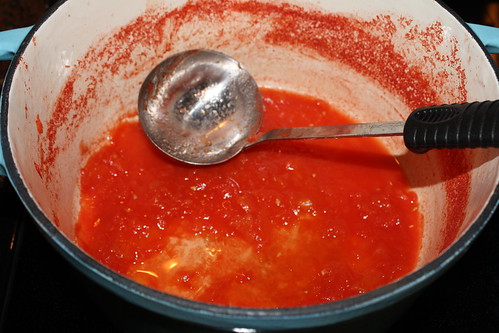
What's that left in my pot? It's the perfect amount of crushed tomato for a single serving of one pot tomato sauce... Perfect! All this tomato crushing has made me hungry...
Thank you for sharing your recipes and tips for your readers--what a privilege for us to get to share in your talents! Yum.
ReplyDeleteYou are quite welcome! I'm having fun sharing :)
ReplyDelete